I recently migrated several gigabytes of photos from Google Plus photos (formerly Picasa) to Flickr. Flickr provides a generous 1TB of data, allows full resolution images and videos and has a thriving community. This was a great opportunity to backup and showcase my photos. I began migrating photos but I hit a serious usability issue. The Flickr photostream is sorted according to the date on which photos are uploaded. There is no option to organize the photos by date taken. This meant that my entire photostream was organized by a single date (the date on which I uploaded all of these photos). The fix was to change the uploaded date to the date the pictures were taken. This meant that I would have to go thru thousands of photos and videos and manually change the date. This was a daunting task that would have taken me the entire weekend. Being a QA/Automation engineer in my day Job I thought surely there must be a faster and easier way to do this.
I found Sikuli a visual automation tool, which can be used to quickly automate things like filling forms, clicking buttons etc and has a much easier learning curve when compared to Selenium or iMacros. With Sikuli my workflow mimicked what I would have done manually.
- Click on You>Organize menu item & then on the “sets & collections” ta
- Click a photo set to edit, double click on the first photo in the set
- Switch to “Dates” tab.
- Copy the date in the “Date taken” field
- Paste the copied date into the “Date uploaded” field
- Check the “go to next item when you save?” box if unchecked
- Press save and advance to next photo.
With the Sikuli Script All I had to do was select the set, bring up photo properties, switch to date tab. Edit the sikuli script and update the total number of photos in the set. Run the automation script. What should have taken days took me about 2 hours flat. Take a look at the video below to see it in action.
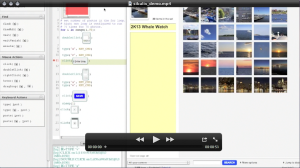
SikuliX & Flickr demo
SikuliX can be downloaded at http://www.sikuli.org/


